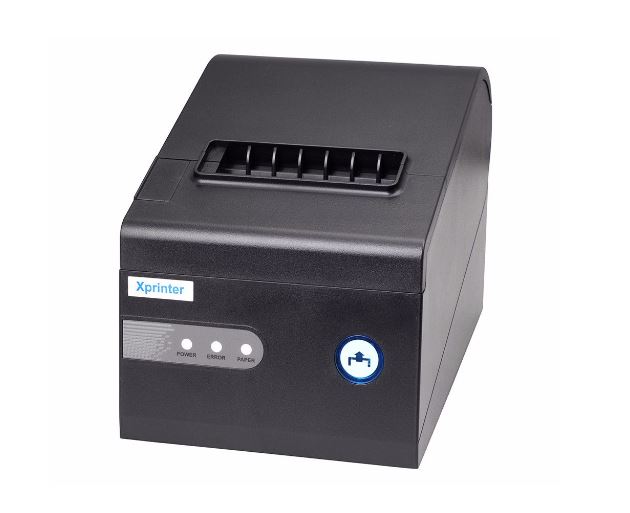

Setting up a receipt printer correctly is an important step when preparing a point-of-sale system for daily business operations. A properly configured printer allows transaction details to be printed quickly and accurately while reducing interruptions at the checkout counter. Whether it is being installed in a retail store, restaurant, or service business, the setup should begin with compatibility and connection checks.
An Xprinter 80mm Thermal Printer can be configured for POS operations by connecting it to the appropriate device, installing compatible software or drivers, loading thermal paper, and selecting the printer within the POS application. The exact procedure can vary depending on the printer model, operating system, and POS software, so checking the relevant product documentation before installation is recommended.
Check the POS System Compatibility
Before connecting the printer, confirm that the POS software supports the printer model and its available connection method. Check the operating system, POS application, and hardware requirements to avoid compatibility problems.
It is also useful to determine whether the POS system requires a specific printer driver or printing utility. Preparing these requirements in advance can make the installation process more efficient.
Prepare the Printer and Accessories
Before beginning the setup, place the printer on a stable and accessible surface near the POS terminal. Make sure the required power adapter, interface cable, and compatible thermal paper are available.
Keep the printer in a location where employees can easily replace paper rolls and access basic controls. Avoid placing it where cables may become loose or where the printer is exposed to excessive dust or moisture.
Choose the Appropriate Connection
The connection method depends on the specific printer model and POS environment. Common options can include USB, Ethernet, and Bluetooth.
USB is generally suitable when the printer is positioned close to a computer or POS terminal. Ethernet can be useful for network-based installations, while Bluetooth may be appropriate for compatible wireless POS devices.
Choose the connection that best matches the existing POS infrastructure and follow the printer’s installation instructions.
Connect the Printer to Power
Connect the printer’s power adapter and switch the device on. Check the indicator lights or other status signals to confirm that the printer has started normally.
If the printer does not power on, check the power cable, adapter, and electrical connection before continuing with the software setup.
Load the 80mm Thermal Paper
Open the printer’s paper compartment and place a compatible thermal paper roll inside. Ensure the roll is positioned correctly and that the printable side faces the appropriate direction.
Pull a small amount of paper through the outlet before closing the cover. A correctly installed roll should feed smoothly when the printer is activated.
Install the Required Driver
Depending on the POS environment, the operating system may require a compatible printer driver. Download or install the appropriate driver according to the printer’s documentation and the operating system being used.
After installation, check the computer’s printer settings to confirm that the device has been recognized successfully. If the printer is not detected, review the connection and driver compatibility before proceeding.
Configure the Printer in the POS Software
Open the hardware or printer settings within the POS application. Locate the receipt printer configuration and select the connected Xprinter device.
Depending on the software, you may need to configure:
- Receipt printer selection
- Paper width
- Print density or formatting
- Receipt layout
- Automatic receipt printing
- Cash drawer settings
- Printer communication settings
Save the configuration after making the required changes.
Set the Correct Paper Width
An 80mm printer should be configured to use the appropriate receipt width in the POS software. Incorrect paper settings can cause text to be cut off, misaligned, or printed with excessive margins.
Review the receipt template and confirm that the content fits within the available printing area. A test receipt is the easiest way to identify formatting problems before the system goes live.
Run a Test Print
After completing the basic configuration, perform a test print from the operating system or POS application.
Review the receipt carefully. Check that the text is clear, product information is displayed correctly, prices and totals are accurate, and the receipt is properly aligned.
If the test print fails, check the connection, driver, selected printer, and POS configuration before processing actual transactions.
Test a Complete POS Transaction
A test transaction provides a more realistic check of the complete setup. Add one or more sample items to the POS system, complete the transaction, and verify that the receipt prints automatically.
Make sure the receipt contains the expected business information, product details, taxes, discounts, payment information, and transaction totals.
This step confirms that the printer is communicating correctly with the POS software rather than simply printing a basic test page.
Check Cash Drawer Integration
If the printer is connected to a compatible cash drawer, verify that the POS system can trigger the drawer correctly after a transaction.
Cash drawer functionality depends on the printer, drawer, POS software, and configuration. If the drawer does not open as expected, review the relevant POS settings and hardware connections.
Troubleshoot Common Setup Problems
Several basic issues can prevent a newly installed printer from working correctly. If the printer does not print, check that it is powered on, connected properly, and selected as the default or assigned receipt printer.
If receipts are blank, verify the thermal paper orientation. If content is cut off, review the paper-width and receipt-layout settings.
For network or Bluetooth installations, confirm that the POS device can communicate with the printer through the selected connection.
Keep the Printer Ready for Daily Operations
Once the setup is complete, keep a spare supply of compatible thermal paper near the checkout area. Employees should also know how to replace a paper roll and perform basic troubleshooting.
Regular cleaning and inspection can help maintain consistent print quality. Any maintenance should follow the printer manufacturer’s recommended procedures.
Final Setup Checklist
Before using the printer for live transactions, confirm the following:
- The printer powers on normally.
- Compatible 80mm thermal paper is installed.
- The connection is stable.
- The correct driver is installed when required.
- The POS software recognizes the printer.
- Paper-width settings are correct.
- Test receipts print clearly.
- Complete POS transactions produce receipts correctly.
- Cash drawer functions correctly if connected.
- Employees know the basic operating procedures.
Conclusion
Setting up an Xprinter 80mm thermal printer for POS operations involves several straightforward steps, including checking compatibility, connecting the hardware, installing the necessary driver, loading thermal paper, and configuring the printer within the POS software.
A complete test before going live is essential because it confirms that the printer, POS application, and other connected hardware are working together correctly. With proper installation, configuration, and routine maintenance, the printer can support reliable receipt printing throughout daily business operations.