
Proper installation is just as important as selecting high-quality audio equipment. Even the best speakers and amplifiers cannot perform at their full potential if the Red Black Speaker Cable is installed incorrectly. Correct cable routing, secure connections, and proper polarity all contribute to better sound quality, reliable performance, and a longer-lasting audio system.
Whether you’re installing a home theater, stereo system, commercial sound setup, or public address system, following the right installation practices will help you achieve the best results. Here are some essential tips for installing red black speaker cable correctly.
Understand the Purpose of Red Black Speaker Cable
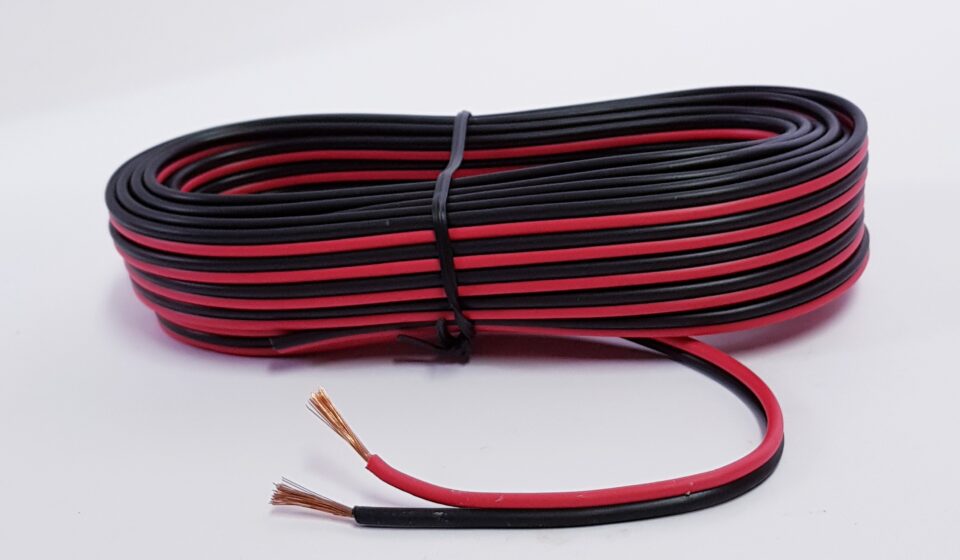
A Red Black Speaker Cable is a two-conductor cable designed to connect an amplifier or receiver to loudspeakers. The red conductor is typically used for the positive (+) terminal, while the black conductor is connected to the negative (-) terminal.
The color-coded design simplifies installation and helps maintain consistent polarity throughout the audio system.
Plan the Cable Route Before Installation
Proper planning helps prevent installation problems and creates a cleaner setup.
Before running the cable:
- Measure the distance between the amplifier and each speaker.
- Choose the shortest practical route.
- Avoid unnecessary loops and excess cable.
- Identify areas where the cable may require protection.
A well-planned cable route reduces material waste and improves overall system organization.
Maintain Correct Polarity
One of the most important installation steps is maintaining proper polarity.
Always connect:
- Red conductor to the positive (+) terminal
- Black conductor to the negative (-) terminal
Maintaining consistent polarity across all speakers ensures that they move in the same direction, producing balanced sound and proper stereo imaging.
Incorrect polarity can reduce bass response and negatively affect overall sound quality.
Choose the Appropriate Wire Gauge
Selecting the proper cable size is essential for efficient power transmission.
Common wire gauges include:
- 16 AWG for shorter cable runs
- 14 AWG for medium distances
- 12 AWG for longer cable runs or high-power systems
Using the correct gauge helps minimize electrical resistance and supports consistent audio performance.
Keep Speaker Cables Away from Power Cables
Speaker cables should be routed separately from high-voltage electrical wiring whenever possible.
Running Red Black Speaker Cable alongside power cables can increase the risk of electromagnetic interference, which may affect audio quality.
If crossing electrical wiring is unavoidable, cross at a right angle rather than running the cables parallel for long distances.
Avoid Sharp Bends
Speaker cables should never be bent excessively during installation.
Sharp bends may:
- Damage the conductors
- Crack the insulation
- Reduce cable lifespan
- Affect signal transmission
Use smooth curves when routing cables around furniture, walls, or equipment.
Secure the Cable Properly
Proper cable support helps prevent damage and keeps the installation organized.
Use suitable cable clips, ties, or supports to:
- Prevent sagging
- Reduce strain on connections
- Keep cables neatly arranged
- Protect against accidental damage
Avoid over-tightening cable ties, as excessive pressure can damage the cable jacket.
Leave Extra Cable for Future Maintenance
Avoid cutting the cable to the exact required length.
Leaving a small amount of extra cable provides flexibility for:
- Equipment replacement
- Future upgrades
- Maintenance
- System reconfiguration
Extra cable also reduces stress on connection points.
Make Secure Connections
Reliable electrical connections are essential for maintaining high-quality sound.
When connecting the speaker cable:
- Strip insulation carefully.
- Avoid damaging the copper conductors.
- Tighten all terminals securely.
- Confirm correct polarity before completing the installation.
Loose or poorly connected cables can result in distorted sound or intermittent signal loss.
Label Cable Runs
In systems with multiple speakers, labeling each Red Black Speaker Cable simplifies installation and future maintenance.
Labels can identify:
- Speaker location
- Amplifier channel
- Zone number
- Equipment destination
Proper labeling reduces troubleshooting time and minimizes installation errors.
Test the System Before Finalizing
Before completing the installation, thoroughly test the entire audio system.
Verify:
- Correct speaker polarity
- Secure connections
- Balanced audio output
- Absence of unwanted noise
- Proper operation of every speaker
Testing helps identify potential issues before the installation is finished.
Choose High-Quality Speaker Cable
Even the best installation techniques cannot compensate for poor-quality cable.
Selecting a well-manufactured red black speaker cable offers:
- Better conductivity
- Lower resistance
- Improved durability
- Longer service life
- Consistent audio performance
Quality cable helps ensure reliable operation for many years.
Follow Good Cable Management Practices
Neat cable management improves both appearance and maintenance.
Organize cables by:
- Keeping runs tidy
- Avoiding unnecessary tangles
- Separating audio and power cables
- Securing cables along walls or cable trays
Well-managed installations are easier to service and upgrade in the future.
Conclusion
Proper installation of Red Black Speaker Cable is essential for achieving reliable performance and superior sound quality. By planning cable routes, maintaining correct polarity, selecting the right wire gauge, keeping cables away from electrical interference, making secure connections, and following good cable management practices, you can maximize the performance of your audio system. Combined with high-quality speaker cable, these installation techniques help ensure clear sound, dependable operation, and long-term reliability for residential, commercial, and professional audio installations.